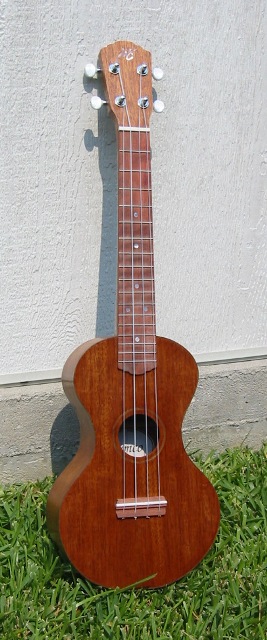
Tenor Ukulele No. 1 Building Notes
completed June 2005
 Wood
and hardware is a Ukulele
Supply of
Hawaii
tenor ukulele kit. It includes:
Wood
and hardware is a Ukulele
Supply of
Hawaii
tenor ukulele kit. It includes:
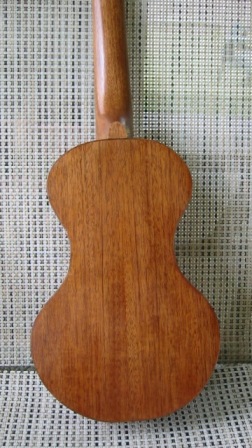
- Top, Back, Sides, and Neck: Mahogany
- Nut
and saddle: Corian or some similar material
- Tuners: Gotoh SGM mini
- Fretboard and Bridge: bubinga
I also got a nut slotting file from them.
The binding and rosette are from some walnut I had
lying around.
Inlay and position dots: Pearloid (Mother of Toilet Seat) from
Constantine's Wood
Center
Finish: Birchwood Casey Tru-Oil
Strings: Aquila Nylgut high G tenor all nylgut (no wound
third.)
The neck is a Bolt-on using two 8-32 hex head cap screws
and brass threaded inserts from the local big box hardware store.
All glue is Franklin Titebond, except the label was glued in
using unflavored gelatin.
Information resources include (but aren't limited to) Denis
Gilbert's The Ukulele, Cumpiano and Natelson's Guitarmaking:
Tradition and Technology, the very informative Ukuleles by Kawika
site, and the Musical
Instrument Maker's Forum.
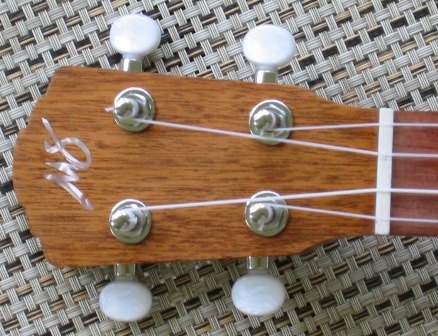
You can't see it here, but one of
the tuners is a little out of position. I had to plug and redrill the
hole. Fortunately, the bushing covers it up.
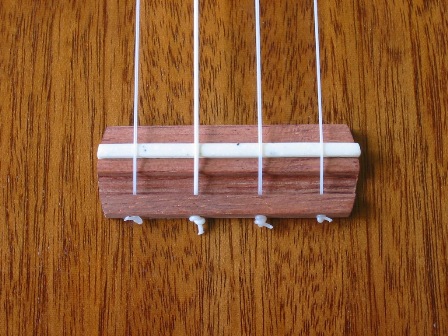
Not seen in this photo is the fact that the
back end of this bridge is lifting. Has been ever since I strung it up.
I didn't get all the finish off the top before gluing, but it's stable,
so I'm not messing with it until it comes off.
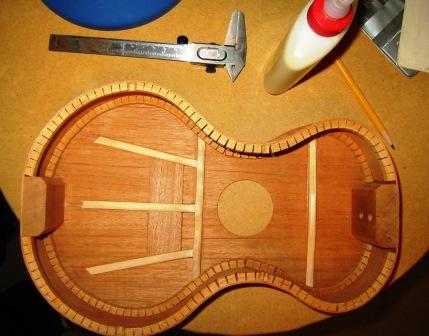 Top
bracing, for those that are
interested.
Top
bracing, for those that are
interested.
This instrument was definitely what they call a learning
experience. Now I know a bunch of ways not to do
things. Here are some examples:
- Don't draw up your own plan for the first few instruments.
Go with something tried and true, even if it's not your favorite. I'm
not happy with the shape and soundhole location of this one.
- Make sure that your mold is symmetrical. You are
using a mold, aren't you?
- Making your own binding is difficult, especially if all you
have is a scroll saw for ripping long strips.
- You can use wood filler putty for gaps, but it won't look
good. CA and sawdust is slightly better.
- The Dremel router base really won't do for precision work.
But it's usable, especially for inlay. (More specifically, depth
adjustments aren't repeatable and it's too flexible. This applies to
the old router base; I have not used the new plunge router base.)
- Try to keep hide glue (or unflavored gelatin, in my case)
off the front side of your label.
- When they say that finish will magnify flaws in the wood,
they aren't kidding.
I don't mean to discourage anyone from building an instrument.
So here are some things that I like about how this turned out:
- The rosette (just a plain walnut ring) came out quite
nicely.
- I'm pretty pleased with the headstock inlay, which is
cellulose acetate. (or pearloid, or Mother of Toilet Seat, or
whatever.) I didn't have to fill around the edges very much at all.
- While I'm not especially happy with the binding in general,
the end graft looks pretty good.
- I'm pleased with the neck and fretboard. Frets were pressed
in using my 9" drill press and a piece of oak as a caul.
But hey, how does it sound? First, here's
an mp3 clip of a tenor Fluke
for reference. And here's
an mp3 clip of the one I built. Both were recorded with the same
microphone, preamp, strings, and musical selection. File size is about
165K each, in glorious mono.
For the true diehards, I've made my building log available here.
Last updated 24 February 2006